As I sit here with my morning coffee, local nurseries are scurrying around like busy bees setting up their plant stands at the likes of Lowe’s, Wal-Mart and Home Depot. This is an exciting time of the year for us gardeners, anxious to see the tried and true varieties, as well as any new offerings of flowers and vegetables.
As exhilarating as these nursery-grown plants can be, nothing ignites the imagination and growing juices like plants started from seeds. Seeds offer a much greater array of choices than can be found in most nurseries.
Every year, right after Christmas, my mailbox is inundated with mail order catalogs from companies across the world. Some are specific flower bulbs or trees; while others run the gamut from flowers to fruits and vegetables. If you do not receive these catalogs already, just do a quick search online and request one.
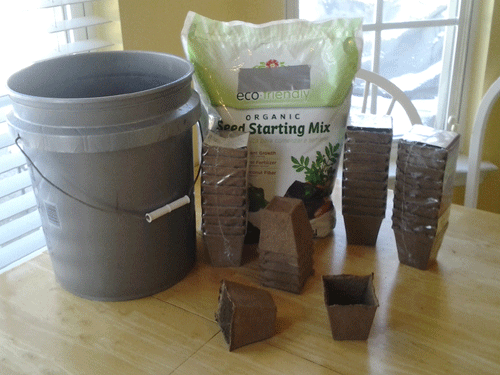
Once you have selected and purchased your seeds, what’s next? First, you need seed-starting pots and a sterile, soil-less medium in which to plant them. There is a wide array of selections for seed starting containers, so let experimentation be your guide. Find what works best for you and your gardening space.
Today’s selections of seed starting mediums are much greater than in the past. If you are not a strict organic gardener, some even offer fertilizer premixed in to the medium. And here’s a money saving tip: buy a less expensive, generic potting mix and add one-tablespoon of bone meal for each quart of mix. This will help get your plants started off right.

Planting the Seeds
You will then need to moisten the mix in a bucket. You do not want it to be water logged, but evenly moist. Follow the directions on the back of the seed packet for planting depth.
When seeds are covered, I place the pots on trays and slide the whole works into a plastic trash bag. This holds in the moisture so the mix does not dry out while keeping the seeds evenly moist.

Placement for Germination
I then place them on top of my kitchen refrigerator to germinate. The top of the refrigerator stays more evenly heated throughout the day, which seeds adore for optimal germination. After three days I start checking them daily for signs of growth.
Once I see that the majority have sprouted, I move them to a heated room under four foot shop lights that are kept one to two inches above the leaves and raised as needed while they grow. When the plants put out their first set of true leaves, I thin them and leave the stockiest, healthiest seedlings.
Hardening Off
A couple of weeks before I plant them in the garden, I harden off the plants by setting them outside in a sheltered location out of the harsh winds and direct sunlight, for only a couple of hours the first day. On the next day, I leave them for a couple hours more and continue adding to the time each consecutive day until they are able to stay out all night and day.
All that is left is to plant them in your garden and enjoy!
Kevin Johnson has been an avid gardener for 40 years. He is passionate about all aspects of gardening, from soil preparation, to planting, to canning his produce. Kevin lives in North Carolina with his wife and two sons.

