
We all love a lush, green lawn and while there are many varieties of grasses to choose from, there are only four common methods of establishing or repairing a lawn.
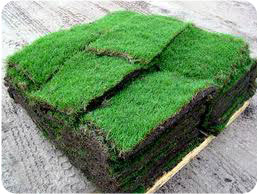
Sodding
Establishing a lawn by Sodding produces a near instant green lawn. For the DIYer it can require some hard physical labor, but the process is relatively simple, requires just a few basic tools and most reasonably sized projects can be completed in a weekend. The price of a sodded lawn can be an issue for many home owners. For more on costs, SODDING.COM discusses the cost of sod
The Right Tools
- A sharp knife and/or a sharp edged masonry trowel to cut sod with.
- A lawn roller to prepare your soil and to aid in sod compaction.
- A wheel-barrow to help transport sod.
- Pieces of plywood and/or boards to kneel and walk on.
- A rake to finish sections of soil when disturbed.
- Watering hose and water to moisten the soil surface and sod when planting.
- Potting soil to fill any gaps that exist between the pieces of sod.

Soil preparation
If you need to remove any areas of old lawn, renting a sod cutter for $75 to $100 a day, allows you to slice off old grass and weeds at the roots. You may want to kill-off the old lawn with a broad-spectrum herbicide such as RoundUp or glyphosate first. Once the old grass and weeds are dead, remove them using a sod cutter or till them into the soil.
This is a great time to make any needed changes to the slope and drainage of your yard. Any low spots can be filled, and high spots leveled off. Some older lawns can have 4-6 inches of topsoil and in these cases, it is best to remove this topsoil before filling low areas, or removing high spots, then replacing the topsoil.
Once you have achieved the desired slope and drainage areas, you’re ready for the finishing touches in the preparation stage. You’ll want to make sure that the soil surface you are placing sod over is raked smooth and free of any debris that could interfere with the sod making good contact with the soil.

Laying Sod
Insure that your sod is fresh by having it delivered as soon after it is harvested as possible. Make sure that you’re ready to start laying following delivery.
Lightly water each area of soil so the ground is not dry, but not dripping wet either. Starting along the longest straight edge, lay the sod down in strips like you’re laying bricks. Make sure the edges are placed tightly together (to prevent drying) and that each consecutive row is staggered to prevent water run-off and slipping (shown). It’s also a good idea to kneel and walk on plywood while working with sod so you do not disturb the pieces already laid.

If any gaps appear in the joints (there usually are some), it is best to fill them up as quickly as possible with potting soil to prevent moisture from escaping. Thoroughly water each piece of sod once the area is laid. This is a critical step in helping the sod overcome transplant shock resulting from harvesting only a small layer of the root system.

Once all your sod is down and trimmed,you will need to roll over it with a lawn roller to smooth out the rough spots and eliminate any gaps between the sod and soil. Plan on watering your newly sodded lawn daily (mornings preferably) for the next 6 weeks until firmly established. It’s important that when watered, the lawn gets saturated. After a few weeks, the grass roots in the sod should start growing into the soil.
More information on sodding from Purdue’s Turf-grass Science program.
Be sure to check out the helpful information on our website, including other uses for the ProPlugger including:
Sod source throughout the Southeastern US – Super-Sod