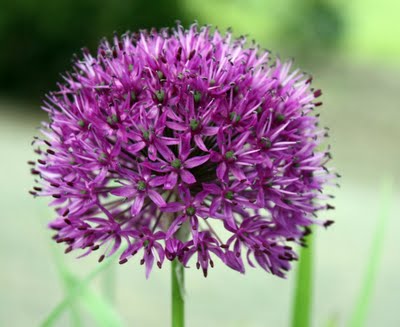
Like a skyscraper towering over townhouses in a big city, Allium will rise above the rest of the flowers in your flower garden (Allium Purple Sensation shown at right). This rather peculiar plant with its large globe shaped–flowers (measuring up to 8 inches in diameter), is a nice addition to a garden, especially when planted near a tall structure, such as a picket fence or foundation of a home. It also looks impressive rising out of the middle of a perennial garden.
Allium is planted in the fall for late spring to early summer blooms, giving you something to look forward to from a bulb after the tulips and other spring bulbs quit blooming. Allium comes in purple, burgundy, lilac, silvery amethyst, pink, blue, to yellow and white. And get this: allium (Latin word for garlic) is closely related to garlic and leeks so deer don’t like them!

When to plant:
Plant allium bulbs in the fall after the ground has cooled, which means late September to early October in the northern states (zones 3-5), and into November in the southern states (zones 6-8). Click on the hardiness map (right) to find your hardiness zone by zip code.
Where to plant:
Plant allium in full sun or light shade and in well drained soil. Plant in beds and borders and in clusters of 6-12 in the middle of a perennial garden.
Planting depth:
Allium should be planted 2-3 times as deep as the bulb is tall. Planting them too deep can result in problems with germination. The tip of the bulb should be pointed upward.
Spacing:
Space allium about 6-8 inches apart.
How to plant allium bulbs:
Let’s face it, most bulb planting methods have us spending a lot of time bending over or on our knees. The ProPlugger 5-IN-1 Planting Tool allows you to do most of the hard work of digging your bulb planting holes from a standing position.
To pull plugs, slide the 2″ or 4″ metal depth ring onto the bottom of the main tube to set the desired depth of the planting hole. Or to dig a 6″ deep hole, no depth ring is needed.
(Step, Twist and Pour) Step down on the foot pegs until the depth ring bottoms out against the ground. Give the 5-IN-1 a slight twist to break the soil plug free and pull straight up on the handlebars. To empty the plugs, simply turn the plugger upside down and pour the plugs out of the top of the tube.
The soil gets stored inside the tool as you work, enabling you to dig over a dozen planting holes, one right after another. Place the bulb in the planting hole, pointed tip facing upward. Fill in the hole with the soil you removed with the 5-IN-1. Firm the soil over the bulb with your foot.
Feeding:
When the leaf tips begin to poke out of the ground, apply a 5-10-10 fertilizer. About the time of flowering, top dress with a 0-0-10 or 0-0-50 fertilizer. Fertilize in the spring of each year with a 5-10-10 fertilizer or all purpose fertilizer used for feeding flowers. Mulching around the plants with aged compost or well rotted manure will achieve the same effect as a light feeding of fertilizer.
Hardiness Zone:
Alliums are hardy in zones 3-8; however, this varies by variety, so always check to make sure the alliums you purchase are hardy for your area.
Disease and pest problems:
Leaf-spotting, mildew and rust can be a problem. Always purchase firm, quality bulbs and store in a cool, dry area until they can be planted. Plant in well-drained soil. A fungicide, applied to the leaves of the plant (before a fungus takes hold), can be used as a preventative measure.
Neil Moran is a horticulturist and author of three books on gardening. He is also the creator and author of the garden blog North Country Gardener
Additional Resources:
Pacific Bulb Society – AlliumFind your USDA hardiness zone using your zip code
Be sure to check out the helpful information on our website, including other uses for the ProPlugger including: